October 30, 2015 1 Comment

Our customer Angel Hernandez has been sending us some amazing photos of his engraved bench tops. In this post I am going to share his process for applying letters or engraving to your concrete benches. Thank you Angel for sharing your photos and your technique!
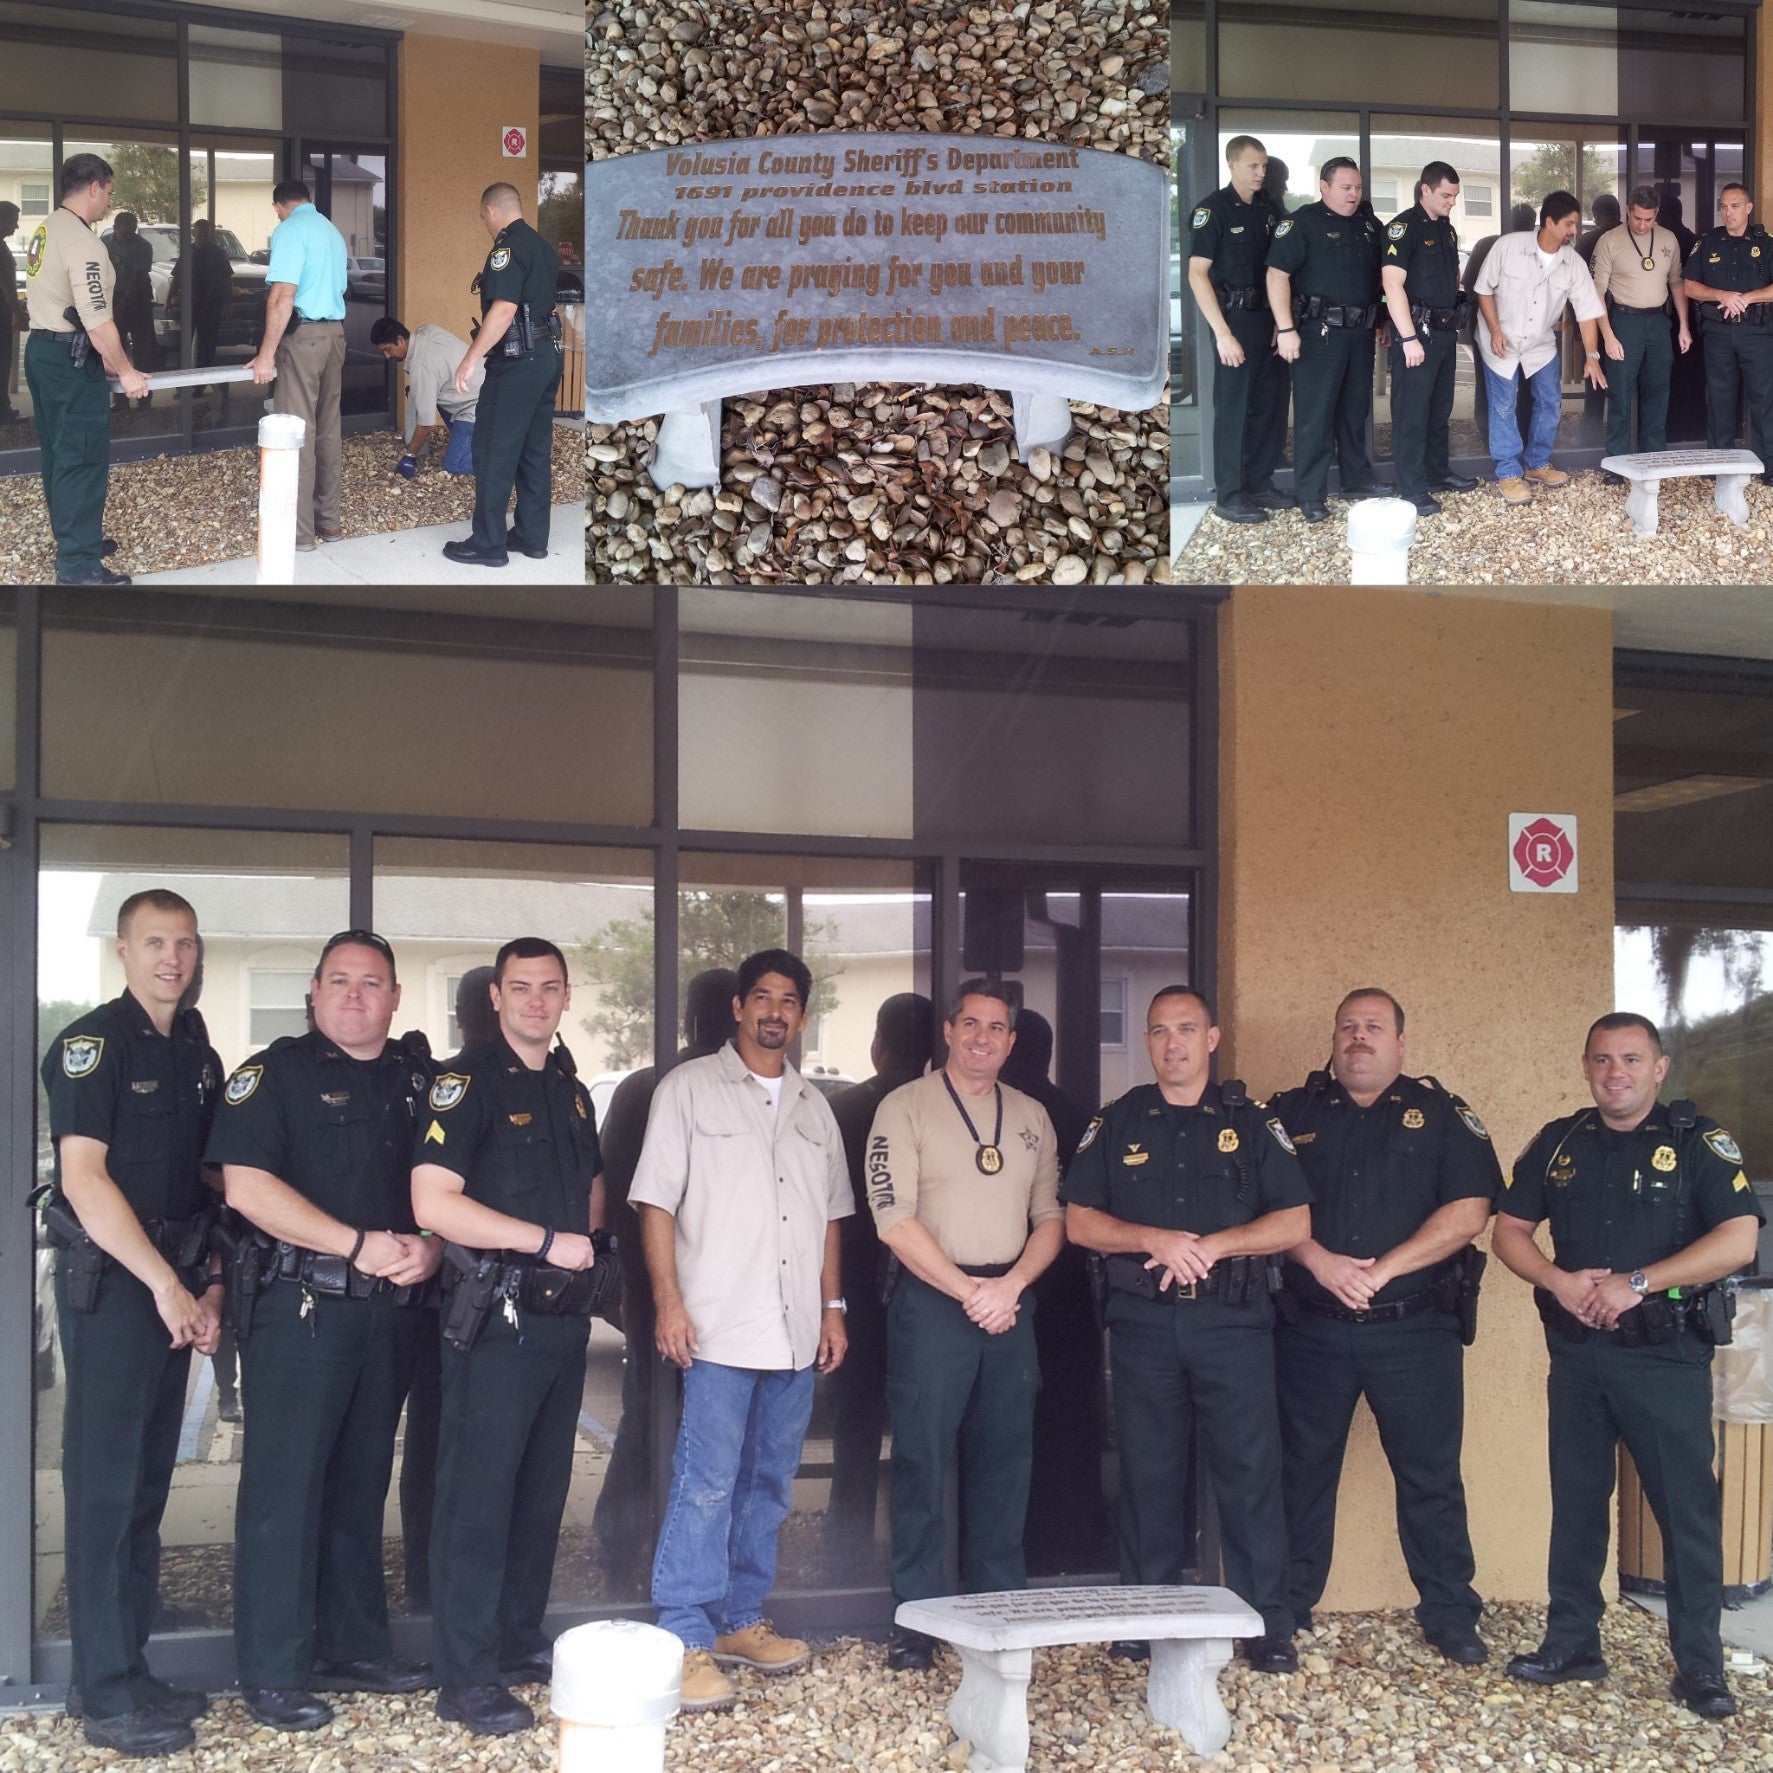
It made my day just opening the email from Hernandez with these photos. What a thoughtful gift for his community. Hernandez delivered this customized bench to his local sheriffs office as a gift to express his gratitude for their hard work.


Here is what Hernandez had to say about his project.
" A few days ago my wife & I had the honor to meet and stand among these gentlemen that serve and protect our city. I can't thank them enough for the hard work they put into building a stronger and safer community here in the City of Deltona and the County of Volusia.
The Kindly accepted our appreciation bench, a small token of gratitude that we can not compare to the greatness in their daily valor. Every day they put their lives on the line for us citizens and among the negative things going on in this small community can make changes for the greater good, and have a positive outlook instead of allowing the bad to vanquish us." Angel Hernandez @lifeisdogs
More photos:


Want to make your own personalized bench? Here are the tips and tricks behind his process. Thank you again Angel Hernandez for sharing these photos as well as your instructions!!
1x Bench Mold-
4x Vynal Lettering - (This site lets you customize fonts and placement) You will need 4 of each letter for thickness
1x 80 lb bag of concrete- Or 2 60 lb bags for our large curved bench and double bench leg
1x can Ace Metallic Paint ( or any other outdoor paint of your choosing)
- Paint brushes in a few different sizes

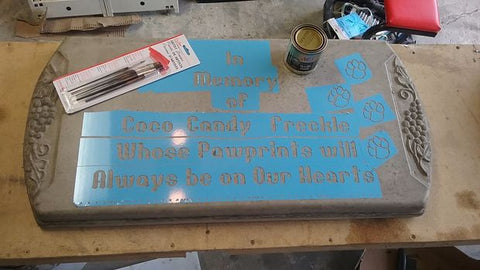
* Remove the sticky film from the Vynal then place your letters on the mold
(Make sure the writing is backwards or mirrored, as shown in the photo)
* Spray cooking spray evenly over the inside of the bench mold and on the letters.
* Pour the concrete mixture into the mold slowly and tapp the sides of the bench mold to get air bubbles out.
* Let dry for 24hrs. If you leave it longer that is fine.

* Remove your Vynal letters
* Tape the stencil to the bench (over the letters)
* Use paint brushes and paint to fill in your letters
* Let the paint dry
Comments will be approved before showing up.
August 16, 2019
Our customer Victor in Texas was so kind to provide us with photos of his project, during construction and as you can see beautifully completed in time for his daugher's wedding, and surely many other happy events to come.
Victor used History Stones concrete molds to complete the balusters (Venetian style baluser), rails, newel posts and the History Stones Tuscany Column. He did an outstanding job!
During these hot last days of summer is a good time to put your dreams to action by ordering your concrete molds now, while on sale, so you can have them ready to use in the soon coming cooler days of fall. Good Idea right!
Angel A Hernandez
November 01, 2015
Thank you Tala for using the pictures, I hope i can help others create custom personalized benches. If anyone have questions they can email me @ lifeisdogs@gmail.com , setinstonegarden@gmail.com & ashinkgraphix@yahoo.com. I can do set ups & have graphic design & vinyl. I have a dream to make benches for fallen heroes families
#I have a dream #benchforfallenheroes #personilizedbench #helpmemakeitpossible